How to Reduce Bathroom Tiling Cost: Strategic Value Engineering & Planning
The bathroom remains the most expensive room per square foot in the residential envelope, and a significant portion of that capital is traditionally absorbed by the tiling process. This is not merely a matter of material selection; it is a complex intersection of structural preparation, hydraulic waterproofing, and high-precision labor. How to Reduce Bathroom Tiling Cost. When a renovation budget begins to swell, the tiling phase is often where “Fiscal Leakage” occurs—driven by intricate patterns that demand excessive cuts, or substrate failures that necessitate retroactive structural corrections.
To approach a bathroom project with the intent of fiscal discipline requires a shift from viewing tile as a decorative finish to seeing it as a technical system. Every decision made in the design phase—the size of the grout joint, the orientation of the layout, the height of the wainscoting—carries a corresponding labor surcharge. True efficiency is found in “Value Engineering,” the process of achieving the desired aesthetic and functional result through the most direct and efficient mechanical means. This involves identifying which elements provide “Visible ROI” and which are merely “Hidden Expenses” that offer no long-term structural or aesthetic benefit.
The current market for bathroom surfaces is saturated with high-performance alternatives, from large-format porcelain slabs to advanced liquid-applied membranes. However, the abundance of choice has led to a paradox: many homeowners over-specify their projects, using industrial-grade materials where residential standards would suffice, or choosing bespoke handmade tiles that require master-level installation hours. This editorial provides a forensic framework for those seeking to maximize their architectural investment, moving past superficial discounts to analyze the structural and logistical drivers of tiling expenditure.
Understanding “how to reduce bathroom tiling cost”
Mastering how to reduce bathroom tiling cost begins with the recognition that tile is a “Labor-Driven” expense. A common misunderstanding in the industry is that the tile material itself is the primary cost driver. While high-end natural stone can certainly impact the bottom line, the vast majority of the budget is consumed by the hours required to prep the substrate, cut the tiles, and apply the grout. A complex herringbone pattern using a cheap $2-per-square-foot tile will almost always cost more in total than a simple “Running Bond” layout using a premium $12-per-square-foot porcelain.
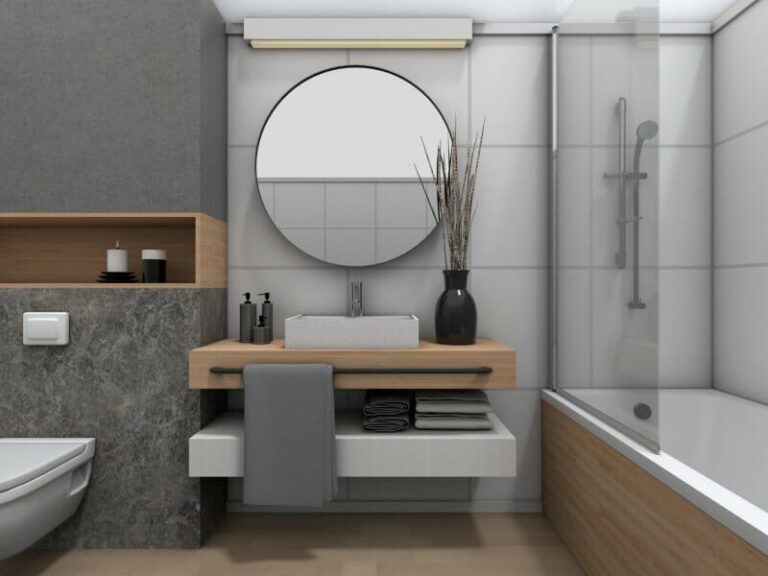
The risk of oversimplification often surfaces in the “Prep Phase.” To properly how to reduce bathroom tiling cost, one must audit the subfloor and wall studs before a single box of tile is ordered. If a homeowner chooses a large-format tile (anything over 12×24 inches), the floor must be “Perfectly Plane.” If the floor is not flat, the tiler must spend days applying self-leveling underlayment or “back-buttering” tiles to prevent “lippage.” This hidden labor can easily add 30% to the initial quote. Choosing a tile size that is more forgiving of slight substrate variances is a primary strategy for cost containment.
Furthermore, the “Waste Factor” is a critical metric. When we discuss how to reduce bathroom tiling cost, we are primarily discussing the reduction of scrap material and unnecessary cuts. Intricate layouts or small mosaics can lead to a 15–20% waste factor, meaning you are paying for material that ends up in the dumpster. By contrast, a “Standard Grid” layout using tile sizes that are mathematically compatible with the room’s dimensions can reduce waste to 5%. Understanding these dynamics involves a transition from seeing the floor as a canvas to seeing it as a geometric puzzle that must be solved for maximum efficiency.
Deep Contextual Background: The Evolution of Sanitary Surfaces
The history of tiling is a narrative of “Access and Standardization.” In the ancient world, tiling was a bespoke, hand-crafted endeavor reserved for the elite, involving small mosaics that required months of labor. The Victorian era introduced the mass-produced “Subway Tile,” which was born out of the sanitary movement. These tiles were designed to be easy to clean and uniform in size, making them the first “Budget-Friendly” high-end surface.
In the mid-20th century, the “4×4 Ceramic” became the standard for American suburban homes, prioritizing speed of installation over aesthetic variety. Today, we are in the “Digital Printing” era, where porcelain can mimic the look of rare Calacatta marble or reclaimed wood with staggering accuracy. This technological shift is the most powerful tool for cost reduction: it allows for the luxury aesthetic of natural stone without the associated costs of specialized sealing, high-waste cutting, and reinforced structural supports.
Conceptual Frameworks and Mental Models
When evaluating a bathroom plan for fiscal efficiency, professionals apply these frameworks to identify “Leaking Capital.”
1. The “Wainscot vs. Floor-to-Ceiling” Model
This framework forces the designer to justify every vertical foot of tile. Does the tile need to reach the ceiling, or can a high-performance moisture-resistant paint suffice for the top 3 feet? Reducing the “Tiled Verticality” by even 24 inches can save thousands in both material and labor.
2. The “Substrate-First” Audit
This model assessment mandates that 10% of the tiling budget be held in “Structural Contingency.” It prioritizes the stability of the joists and the flatness of the wall over the beauty of the tile. A cheap tile on a rock-solid floor will last 50 years; an expensive tile on a bouncy floor will crack in 5 months.
3. The “Standardization” Logic
This model suggests that you should use “Nominal” sizes that require the fewest cuts. For a standard 60-inch shower wall, using 12×24 tiles means exactly five tiles per row. This “Mathematical Harmony” eliminates the need for the tiler to measure and cut every single piece at the end of the row.
Key Categories of Tiling Variations and Trade-offs
| Tile Category | Material Cost | Labor Intensity | Durability | Trade-off |
| Glazed Ceramic | Low | Low | Moderate | Prone to chipping in high-traffic |
| Porcelain | Moderate | Moderate | High | Difficult to cut without specialized tools |
| Natural Stone | High | Very High | High (if sealed) | Requires ongoing maintenance/sealing |
| Glass Mosaic | High | High | Moderate | Difficult to grout; shows substrate flaws |
| Large Format | Moderate/High | High (Specialized) | High | Requires perfectly flat substrate |
| Cement Tiles | High | Moderate | Moderate | Thick profile; difficult to transition |
Realistic Decision Logic
If the goal is to how to reduce bathroom tiling cost in a high-use family bathroom, the logic favors Through-Body Porcelain. It offers the best “Lifecycle Value,” as the color runs through the entire tile, masking any future chips. It also allows for thinner grout lines, which reduces the cost of specialized epoxy grouts and long-term cleaning.
Detailed Real-World Scenarios How to Reduce Bathroom Tiling Cost
Scenario: The “Accent Wall” Pivot
A homeowner wants a shower fully tiled in a high-cost “Zellige” handmade tile ($25/sq.ft.). The technical challenge is that the uneven surface makes installing plumbing fixtures a nightmare. The strategic fix is to use a high-quality, large-format porcelain on the two side walls and limit the Zellige to a single “Feature Wall.” This reduces material cost by 60% and simplifies the plumbing installation, as the valves sit on a flat surface.
Scenario: The “Layout Shift” Savings
A bathroom remodel specifies a herringbone floor. The contractor quotes $18 per square foot for labor due to the complexity. By switching to a “1/3 Offset” (staggered) layout, the labor drops to $12 per square foot. Over a 100-square-foot floor, this single decision saves $600 with virtually no impact on the perceived quality of the room.
Planning, Cost, and Resource Dynamics
The capital dynamics of tiling are weighted toward the “invisible” layers.
-
Direct Costs: Tiles, grout, and metal edge trims (Schluter strips).
-
Indirect Costs: Waterproofing membranes (liquid or sheet), cement board, and thin-set mortar.
-
Opportunity Cost: Choosing a tile that is “Special Order” (12-week lead time) can delay the entire project, increasing the cost of contractor “General Conditions” or temporary housing.
Estimated Tiling Capital Allocation
| Phase | Entry-Level | Mid-Market | Premium / Luxury |
| Surface Material | $2.00 – $4.00/sf | $6.00 – $12.00/sf | $25.00+/sf |
| Preparation/Membrane | $3.00/sf | $5.00/sf | $8.00/sf |
| Installation Labor | $8.00/sf | $12.00 – $18.00/sf | $25.00+/sf |
| Grouting/Finishing | $1.00/sf | $2.00/sf | $4.00/sf |
Tools, Strategies, and Support Systems
-
Laser Levels: Using a laser to set the “First Course” ensures that the entire wall remains level, preventing “Stacking Drift” which is expensive to fix later.
-
Tile Leveling Systems: These plastic clips ensure no “Lippage” between tiles. While they add a small material cost, they save hours of labor spent adjusting tiles manually.
-
Liquid-Applied Waterproofing: Systems like RedGard or Hydro Ban are often more cost-effective for complex shower shapes than traditional “Pan Liners” because they reduce labor time.
-
Wet Saws with Sliding Tables: Essential for making clean, professional cuts in porcelain, reducing the “Breakage Rate.”
-
Metal Edge Profiles: Using Schluter-style metal strips is significantly cheaper than buying “Bullnose” tiles, which can cost $5–$10 per piece.
-
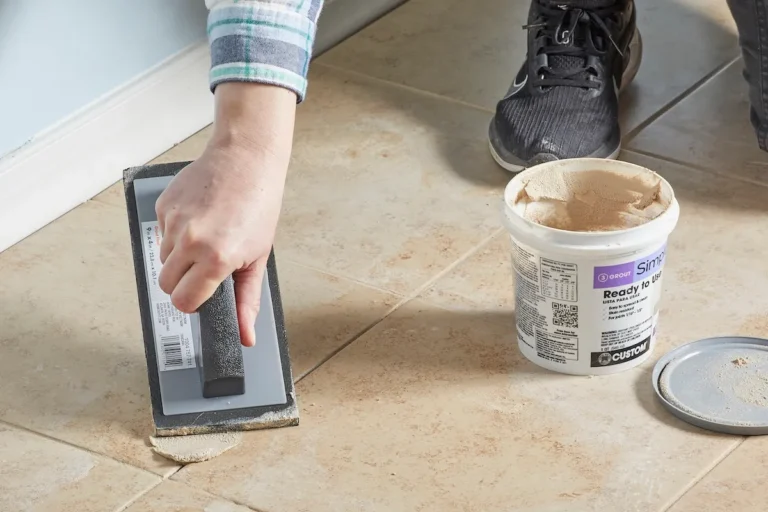
Epoxy Grout: While more expensive upfront, it is stain-proof and never requires sealing, reducing “Lifecycle Maintenance” costs.
Risk Landscape: A Taxonomy of Installation Failure
-
The “Lippage” Liability: Occurs when one tile edge is higher than its neighbor. In a bathroom, this is a trip hazard and a “Grout-Trap” that will eventually crumble.
-
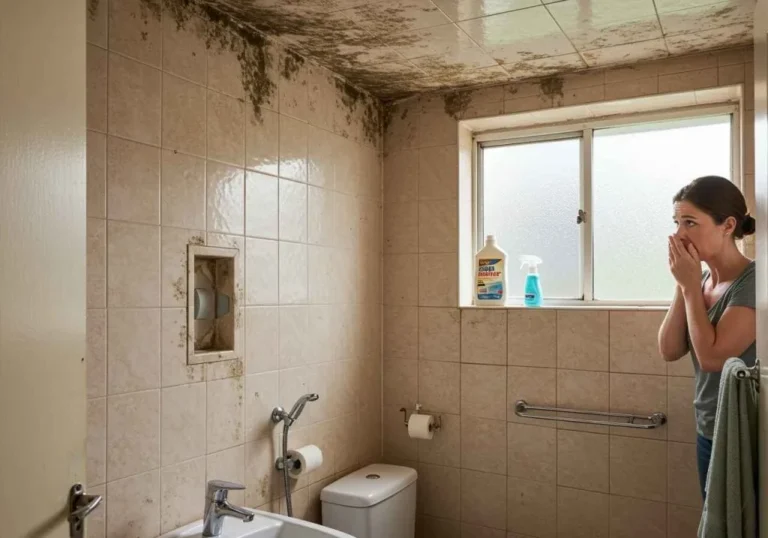
The “Substrate Flex” Crack: Installing tile over a subfloor that is too thin (less than 1 1/8 inches total). The floor will flex, and the grout lines will crack within the first year.
-
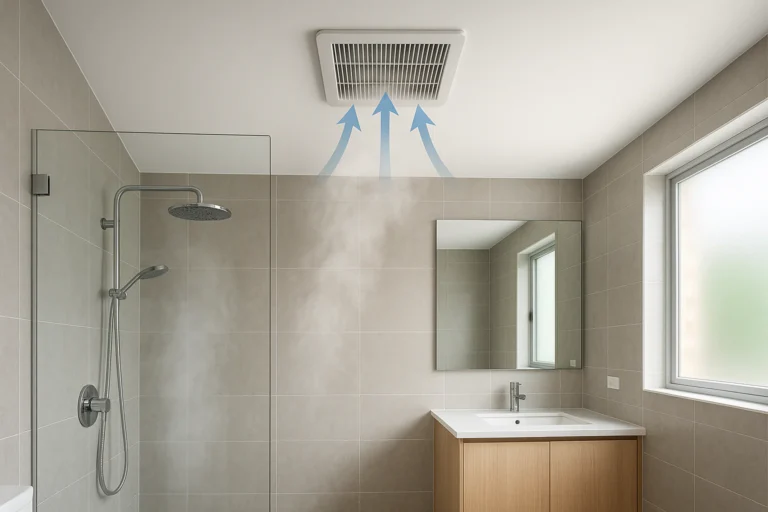
The “Waterproofing Breach”: Failing to overlap membrane seams. This leads to hidden water damage behind the tile, necessitating a total “Tear-out” within 3–5 years.
Governance, Maintenance, and Long-Term Adaptation
To protect the investment in a tiled surface, a governance schedule is required:
-
Annual Grout Inspection: Check for “Hairline Cracks” near the corners or the tub-to-floor transition. These should be filled with color-matched caulk (which is flexible) rather than grout.
-
Bi-Annual Sealing: If using natural stone, a high-quality “Impregnating Sealer” must be reapplied to prevent water from saturating the stone’s pores.
-
Adjustment Trigger: If a tile sounds “Hollow” when tapped, it indicates the thin-set has de-bonded from the substrate. This requires immediate attention before the tile cracks.
Measurement, Tracking, and Evaluation
-
Leading Indicator: “Cut Density”—the number of cuts required per 10 square feet. High density equals high labor.
-
Lagging Indicator: “Grout Line Uniformity”—a primary signal of the tiler’s skill and the substrate’s flatness.
-
Documentation Example: Saving a “Batch Number” or “Lot Code” from the tile boxes. If a tile breaks in 5 years, having the same lot code ensures the color match is perfect.
Common Misconceptions in Tiling Economics
-
“Larger tiles are faster to install.” Correction: Large tiles are heavier, require two people to set, and need a much flatter floor. They are often more expensive to install than 12×12 tiles.
-
“Handmade tiles have more soul.” Correction: They have more “Variance.” This variance requires a tiler to hand-sort every box and “Butter” every back, which can triple the labor cost.
-
“I don’t need a professional tiler for a small floor.” Correction: Small floors often have the most complex cuts (around toilets and pipes), making them technically demanding.
-
“Dark grout hides dirt.” Correction: Dark grout can show “Efflorescence” (white mineral deposits) more than light grout. Proper cleaning is the only solve.
-
“I can tile over old tile to save money.” Correction: This is only possible if the old tile is 100% bonded and the extra height doesn’t create “Door Clearance” issues. It is usually a high-risk gamble.
Conclusion
The pursuit of how to reduce bathroom tiling cost is fundamentally about “Geometric Stewardship.” It is the art of aligning the room’s physical dimensions with the material’s industrial standards. By prioritizing “Substrate Integrity” and “Material Efficiency,” the homeowner avoids the compounding costs of technical failure and labor excess. A flagship bathroom is not defined by the price per square foot of its surfaces, but by the precision of its execution and the longevity of its systems. In the final assessment, true value in tiling is found when the design’s ambition is perfectly matched by its structural resilience.