How to Plan a Vanity Upgrade on a Budget: A Strategic Engineering Approach
The bathroom vanity is the primary mechanical and aesthetic anchor of the residential washroom. It serves as the intersection where complex hydraulic systems—supply lines, p-traps, and drainage vents—meet the tactile requirements of daily grooming and the visual demands of interior design. How to Plan a Vanity Upgrade on a Budget. When a homeowner considers an upgrade, the focus often gravitates toward the surface-level finish or the style of the cabinetry. However, the true complexity of a vanity project lies in the “Hidden Infrastructure.” A poorly planned replacement can quickly escalate from a simple furniture swap to an invasive plumbing and structural repair.
In the current economic climate, the definition of a “budget” project has shifted. It no longer implies a compromise on quality, but rather an exercise in “Value Engineering.” This involves identifying the high-impact variables that define the user experience—such as faucet ergonomics and lighting quality—while minimizing the invisible costs of structural modification. To succeed in this balancing act, one must treat the vanity not as a standalone object, but as a component within a larger “Mechanical Ecosystem.”
The decision to upgrade is often driven by a failure of the existing unit: perhaps the particle-board carcass has succumbed to moisture expansion, or the “Integrated Sink” has developed irreparable hairline fractures. Moving toward a more resilient solution requires a forensic audit of the room’s constraints. From the “Rough-in” dimensions of the wall plumbing to the swing radius of the bathroom door, the physical limits of the space dictate the feasibility of the plan. This editorial explores the systemic methodologies required to execute a sophisticated upgrade without the surcharge of architectural excess.
Understanding “how to plan a vanity upgrade on a budget”
Mastering how to plan a vanity upgrade on a budget requires a rejection of the “Demolish-First” mentality. A common misunderstanding in the DIY sector is that the cheapest path is always to buy the least expensive pre-fabricated unit. In reality, the “Total Cost of Ownership” is often driven by the compatibility of the new unit with the old plumbing. If a new vanity requires the relocation of the drain stack or the supply valves, the labor costs will instantly eclipse any savings found on the unit itself. True budgetary planning begins with “Mechanical Alignment”—selecting a unit that fits the existing “Wet Footprint.”
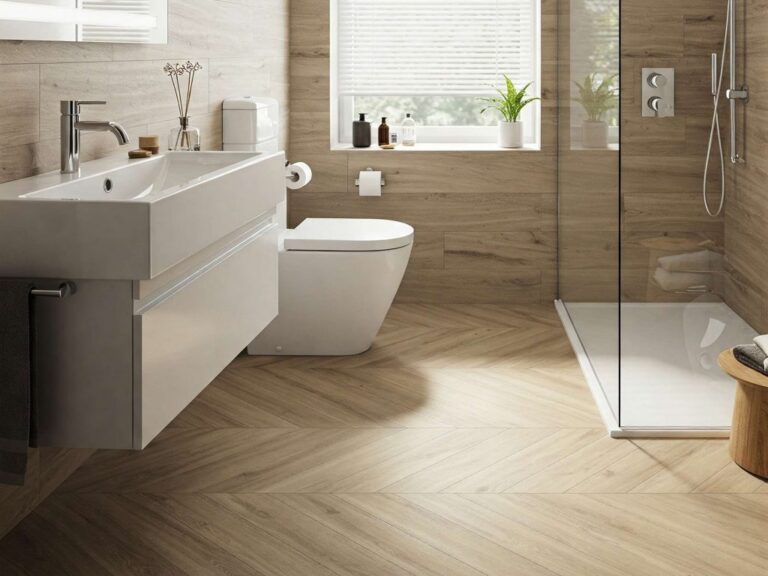
The risk of oversimplification often surfaces in the treatment of the “Countertop Interface.” To properly how to plan a vanity upgrade on a budget, one must evaluate the “Joint Complexity” of the installation. For instance, a “Drop-in” sink allows for the use of a more affordable laminate or butcher-block counter, as the edges of the cut-out are hidden by the sink’s rim. Conversely, an “Undermount” sink requires a professionally polished edge on a stone or quartz slab, significantly increasing the fabrication labor.
Furthermore, the “Volumetric Efficiency” of the unit must be analyzed. When we discuss how to plan a vanity upgrade on a budget, we are often discussing the maximization of storage within a fixed footprint. Modern drawer-over-door configurations offer 30% more usable volume than traditional open-cabinet models, but they require precise “P-Trap Clearance.” If the drawer hits the plumbing, the unit must be modified, leading to “Customization Surcharges.” Understanding these plans involves a transition from seeing the vanity as furniture to seeing it as a “Plumbing Housing” that must be engineered for both access and aesthetics.
Deep Contextual Background: The Evolution of the Washstand
The history of the bathroom vanity is a narrative of “Plumbing Integration.” In the 19th century, the “Washstand” was a piece of dry furniture—a table with a pitcher and basin. As indoor plumbing became standardized in the early 20th century, the “Pedestal Sink” became the hallmark of the sanitary movement, prized for its ability to be cleaned on all sides.
The “Vanity Cabinet” as we know it—a hybrid of cabinetry and plumbing—was a mid-century innovation designed to hide the increasingly complex network of pipes and provide storage for the growing market of consumer personal care products. We have moved from the “Open Utility” of the pedestal sink to the “Closed Complexity” of the modern modular vanity. The current “Budget” challenge is to find units that offer the clean lines of high-end European design while maintaining the “Serviceability” of traditional American plumbing standards.
Conceptual Frameworks and Mental Models
When evaluating a vanity upgrade, professionals use specific mental models to ensure the plan is fiscally and technically sound.
1. The “Plumbing Footprint” Constraint
This model dictates that any movement of the water supply or drain lines by more than 2 inches will increase the labor cost by 40% or more. It prioritizes units that have “Open Back” designs to accommodate existing pipe locations.
2. The “Material Resilience” Audit
This framework assesses the “Life-Cycle Value” of the material. It recognizes that in a high-humidity environment, an “MDF” (Medium Density Fiberboard) cabinet may be $200 cheaper than “Solid Plywood,” but it has a 50% higher failure rate due to water swelling.
3. The “Visual Anchor” Logic
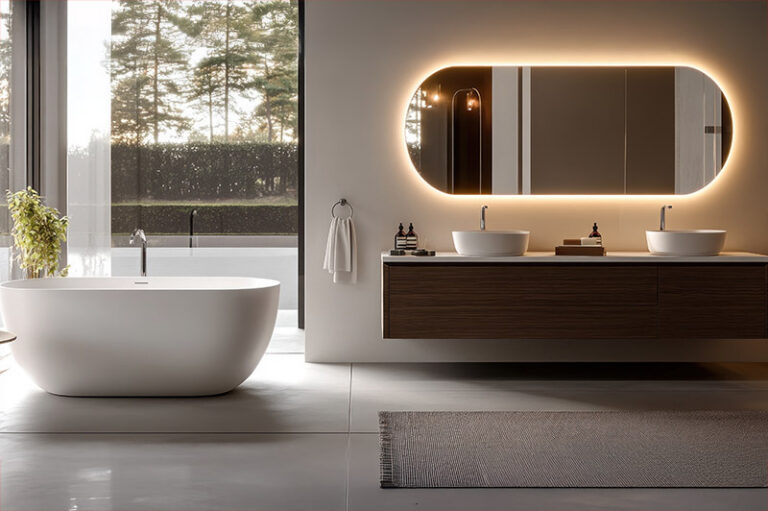
This model suggests that the human eye focuses on three specific touchpoints: the faucet finish, the countertop edge, and the cabinet hardware. By spending on high-quality hardware and a mid-range cabinet, the perception of “Luxury” is achieved without the cost of a full custom build.
Key Categories of Vanity Variations
The selection of a vanity style dictates the “Installation Friction” and the long-term utility of the bathroom.
| Category | Construction Type | Primary Advantage | Mechanical Constraint |
| Freestanding | Furniture-style | Easiest to install; hides flooring | Requires floor-to-wall clearance |
| Floating (Wall-Mount) | Modern aesthetic | Makes small rooms feel larger | Requires “Blocking” in the wall studs |
| Modular | Pre-built sections | Customizable lengths | Often has visible seams |
| Corner Unit | Specialized shape | Maximizes square footage | Limited plumbing access |
| Vessel Sink Unit | Top-mounted basin | High aesthetic impact | Requires “Tall-Reach” faucets |
| Repurposed Antique | Upcycled furniture | Unique; ultra-low cost | Hard to seal against moisture |
Realistic Decision Logic
For a “Guest Bathroom” with limited use, a Freestanding MDF unit is a viable budget choice. However, for a “Primary Bath” where water exposure is constant, a Solid Wood or Plywood Freestanding unit is the superior financial decision, as it prevents a “Second Replacement” five years down the line.
Detailed Real-World Scenarios How to Plan a Vanity Upgrade on a Budget
Scenario: The “Wall-Mount” Structural Surprise
A homeowner wants a floating vanity to modernize a small bath. The technical challenge is that the existing wall is non-load-bearing and lacks the “Internal Blocking” to support 150 lbs of vanity and water. To properly execute the plan on a budget, the wall must be opened to add 2×6 horizontal bracing. The failure mode here is hanging the vanity on standard drywall anchors, which will lead to a catastrophic collapse and a burst pipe.
Scenario: The “Centerset to Widespread” Pivot
The existing vanity has a 4-inch “Centerset” faucet. The new “Budget” vanity top is pre-drilled for an 8-inch “Widespread” faucet. The second-order effect is that the homeowner must buy new supply lines and potentially new valves, adding $150 to the “Simple” upgrade. The strategic fix is to ensure the vanity top hole-pattern matches the existing faucet if the faucet is still in good condition.
Planning, Cost, and Resource Dynamics
The economics of a vanity upgrade are often hidden in the “Ancillary Supplies.”
-
Direct Costs: The cabinet ($300–$1,200), the countertop/sink ($150–$600), and the faucet ($80–$300).
-
Indirect Costs: The “Plumbing Rough-in Kit”—new P-traps, shut-off valves, and braided supply lines.
-
Opportunity Cost: Choosing a “DIY” installation may save $500 in labor, but if the drain is improperly vented, it can lead to “Sewer Gas Infiltration,” which requires a professional fix.
Range-Based Budgetary Estimates
| Component | DIY / Thrift Grade | Professional / Mid-Market | Logic |
| The Unit | $250 (In-Stock) | $850 (Semi-Custom) | Materiality and finish |
| The Faucet | $60 (Import) | $220 (Brass Internals) | Ceramic disc longevity |
| Installation | $0 (Self-Labor) | $450 (Plumber/Carpentry) | Structural and leak safety |
| Misc Supplies | $40 (PVC/Lines) | $120 (Valves/Escutcheons) | Aesthetic continuity |
Tools, Strategies, and Support Systems
-
Oscillating Multi-Tools: Critical for cutting precise notches in the back of the vanity to accommodate existing plumbing.
-
Basin Wrenches: The only tool that can reach the mounting nuts on a faucet behind a deep sink.
-
Siliconized Acrylic Caulk: Provides a waterproof seal between the vanity and the wall that is also “Paintable.”
-
Shims and Levels: Essential for ensuring the countertop is perfectly flat; an unlevel sink will lead to “Standing Water” and mold.
-
Teflon Tape and Pipe Dope: The “Dual-Seal” strategy for preventing leaks on threaded water connections.
-
Cabinet Jack / Support Blocks: For “Wall-Mount” installations, these hold the weight of the unit while you secure it to the studs.
Risk Landscape: A Taxonomy of Installation Failure
-
The “Clearance” Collision: The vanity is 1/4 inch too wide, preventing the bathroom door from opening or the drawer from clearing the door trim.
-
The “Leak-Path” Oversight: Failing to seal the “Pop-up Drain” flange with plumber’s putty, leading to a slow drip that rots the brand-new cabinet floor.
-
The “Valve-Seizure” Event: Attempting to turn off old shut-off valves only to have them break in the “Open” position, requiring a whole-house water shutdown and an emergency plumber.
Governance, Maintenance, and Long-Term Adaptation
A successful upgrade requires an “Operational Maintenance” schedule:
-
Quarterly Plumbing Audit: Check the “Slip-Joints” under the sink for moisture. Vibration from drawers can loosen PVC connections over time.
-
Annual Sealant Review: Re-apply caulk to the “Backsplash-to-Wall” joint to prevent water from dripping behind the cabinet and feeding mold growth.
-
Adjustment Trigger: If the cabinet doors begin to “rub” or misalign, it is a sign of either hinge fatigue or, more seriously, moisture-induced swelling of the carcass.
Measurement, Tracking, and Evaluation
-
Quantitative Signal: The “Dry-Floor Test”—placing a paper towel under the P-trap for 24 hours after installation to detect “Micro-Leaks.”
-
Qualitative Signal: “Drawer Gliding Smoothness”—if the drawers catch or feel gritty, the unit was likely “Racked” (installed out of square).
-
Documentation: Tape the “Installation Manual” and the faucet’s “Replacement Part Numbers” to the inside of the vanity door for future repairs.
Common Misconceptions in Vanity Planning
-
“One size fits all.” Correction: There is no standard height. “Comfort Height” (36″) is standard today, but “Standard Height” (30-32″) is still common in older homes.
-
“Quartz is indestructible.” Correction: While highly durable, it can “Scorch” if a hot curling iron is left on the surface, and it can chip if hit with a heavy object.
-
“I don’t need a backsplash if the wall is tiled.” Correction: You still need a silicone bead to prevent water from migrating behind the vanity.
-
“Plumbing is just Legos.” Correction: “Pitch and Venting” are laws of physics; if the drain doesn’t slope 1/4 inch per foot, it will clog.
-
“Cheap faucets look the same.” Correction: They may look the same, but the “Valves” inside are plastic rather than ceramic, leading to drips within 18 months.
Conclusion
The execution of a vanity project is a test of “Spatial Intelligence” and fiscal restraint. By understanding how to plan a vanity upgrade on a budget, the homeowner transitions from being a consumer of products to a manager of an architectural system. The value is found not in the lowest price tag, but in the highest “Utility-per-Dollar” ratio. A successful upgrade is one that respects the mechanical limits of the building while elevating the daily ritual of the occupant. In the final assessment, the most effective vanity is the one that is so well-integrated into the room’s infrastructure that its beauty is matched only by its silent, leak-free performance.